Frequently Asked Question
How do I create a custom grid to match a project pattern, such as knit pitch?
Most technical projects are much easier to plan and execute when outlined using a graph paper that has exactly the right grid layout, size, and units. For example, making a pattern for a knitting project is much easier when the grid is set to match the knit pitch.
Here are two examples of how make a custom grid for a graph paper to design a knitting project. The first example creates a 2-level grid, the second uses the subdivision feature to create a 3-level grid.
To begin —
This knitting project needs the grid for a knit pitch 0.284cm x 0.145cm.

2-level custom graph paper
For this approach the major grid will be divided into 4 stitches down and 3 stitches across. Setting bold lines at the divisions of 3 across and 4 down will make to easier to design the knitting pattern in Paint.
We'll calculate the size the major grid as a block divided into stitches 4 down and 3 across:
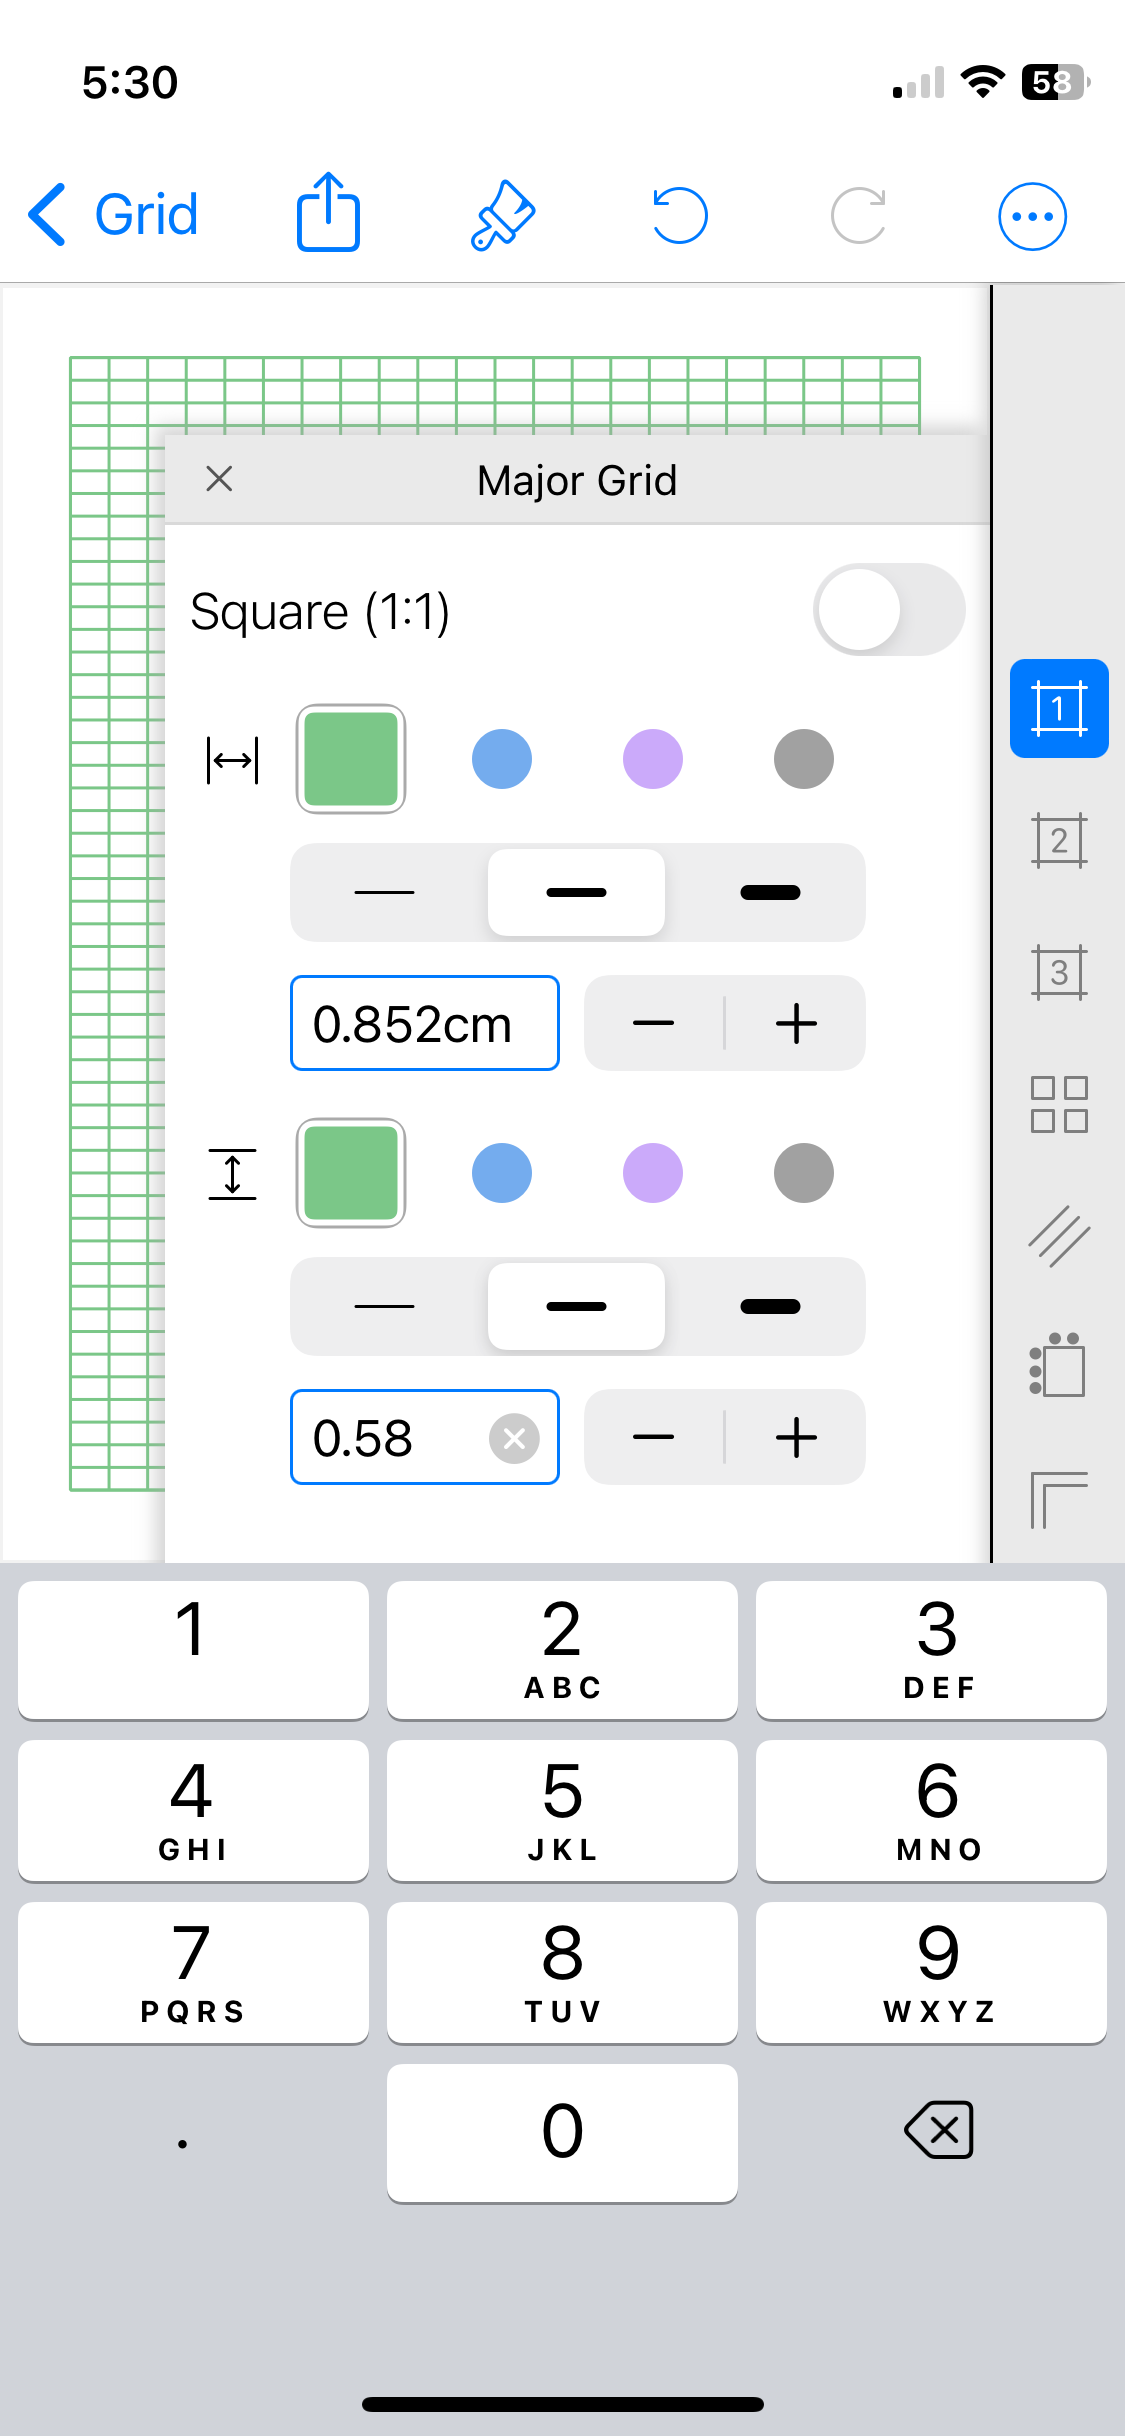
4 stitches x .145cm down = .58cm
3 stitches x .284cm across = .852cm
Set the major grid to .852 x .58
Open the minor grid.
Start the minor grid by tapping a color dot.
Set the grid to 4 down x 3 across and the line weight to light.
Other possible adjustments --
• Set rows & column on the major grid
• Reduce margins to accommodate a larger grid

3-level custom grid using subdivision
Instead the major grid will be divided into 10 stitches:
10 stitches x .145cm down = 1.45cm
10 stitches x .284cm across = 2.84cm
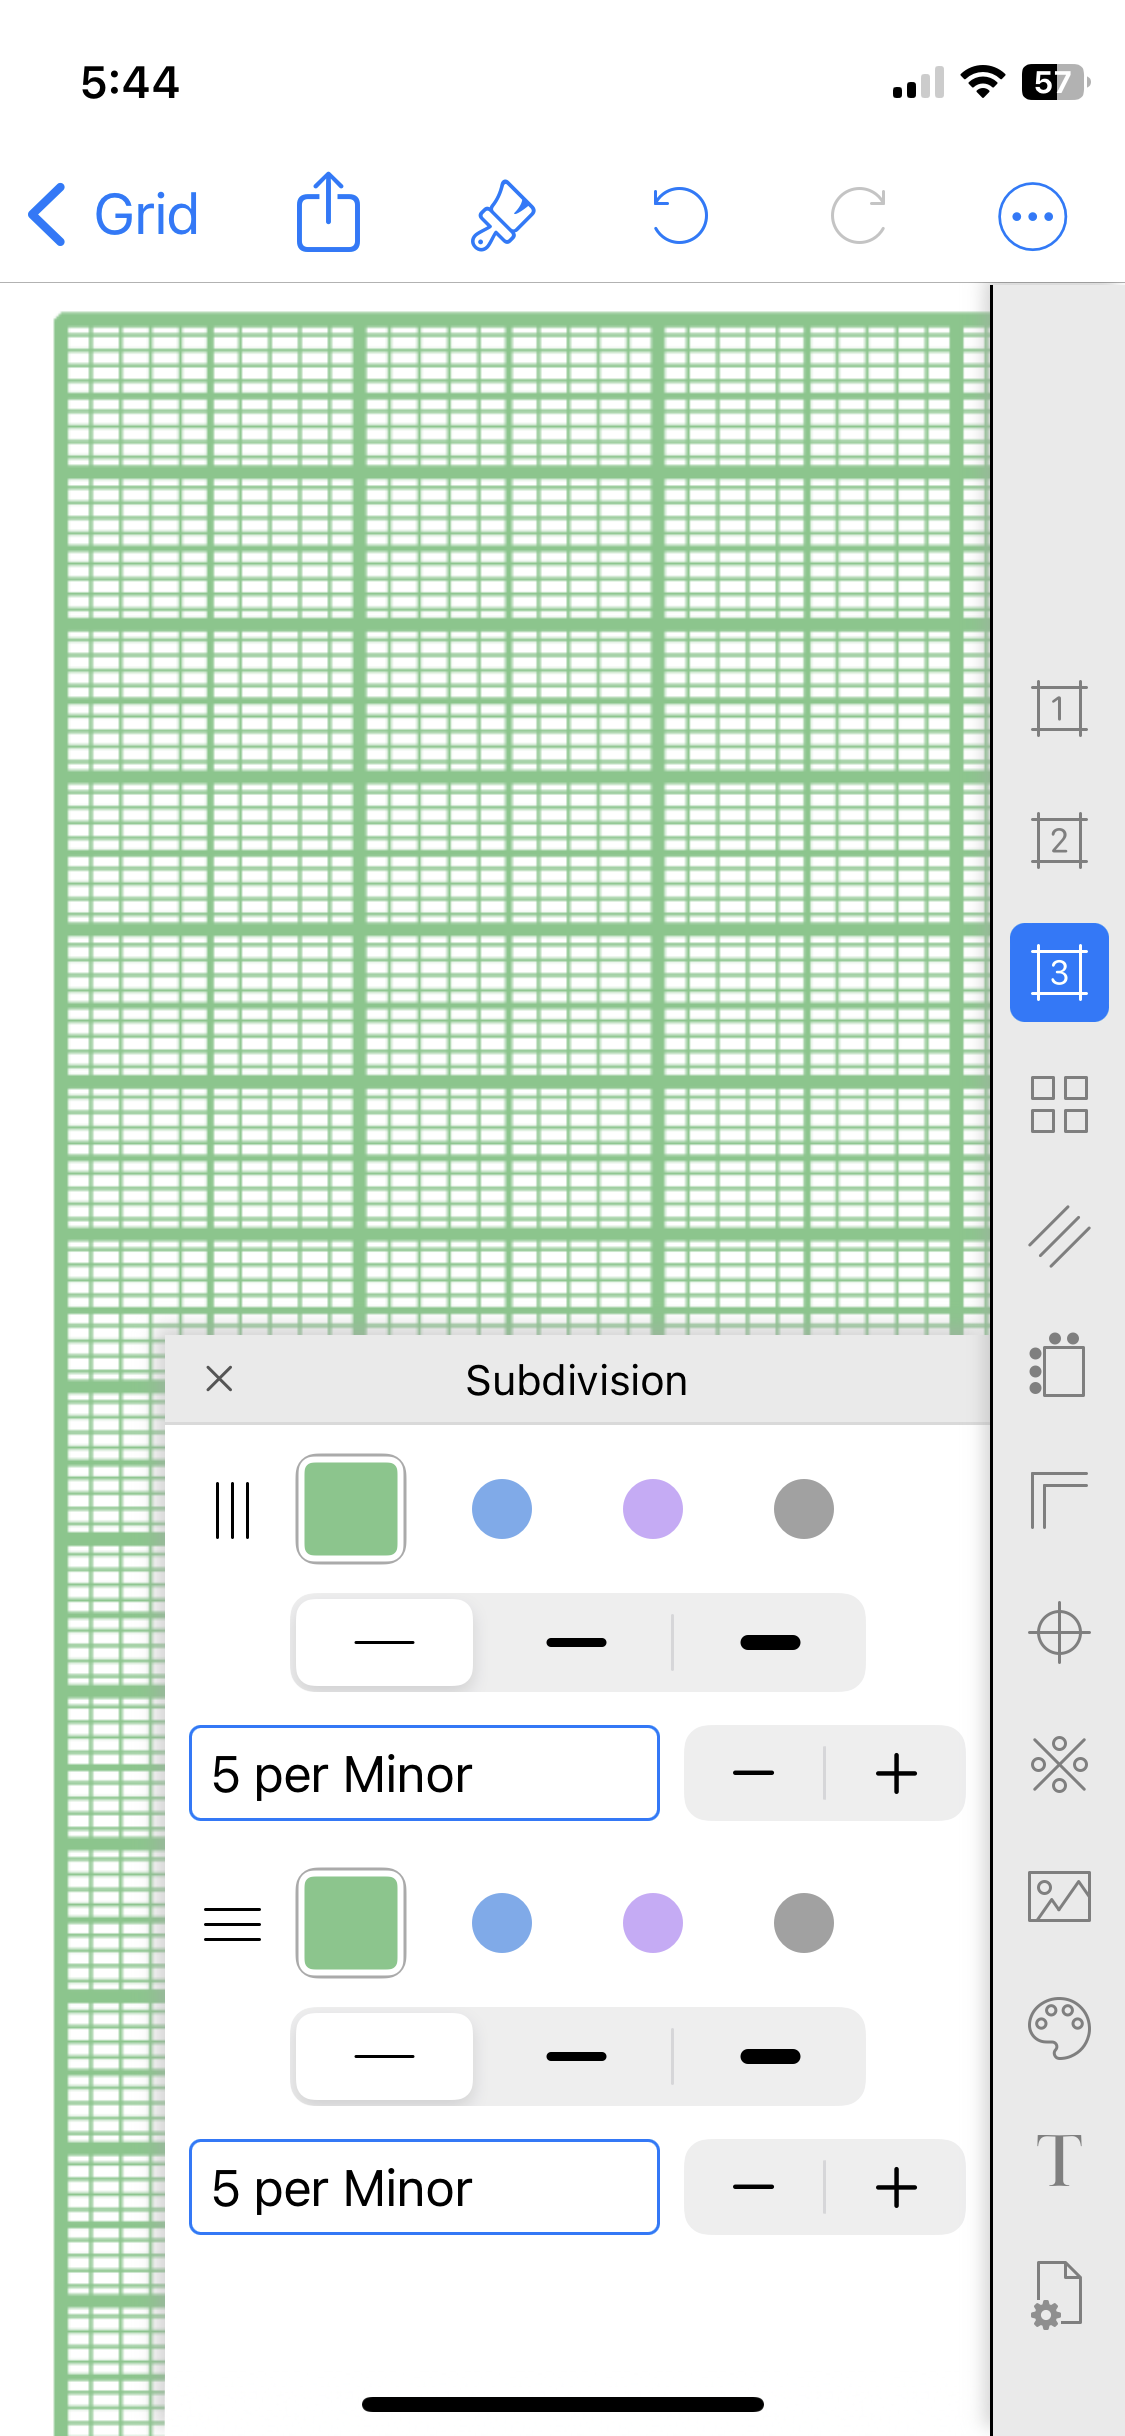
The blocks of 10 will be further divided into subgroups of 5 stitches to make building the project’s plan just even a bit easier.

Set the Major grid to 1.45 x 2.84 and the line weight to bold.
Next, start the Minor grid (tap a color) and set to 2 per Major and line weight to medium.
Add a Subdivision and set to 5 per Minor and line weight to fine.
To print complex grids with fine line graph paper, read How do I? on creating a grid with fine lines