
Frequently Asked Question
How do I make my own HRT templates using the HST&HRT paper?
Using a template makes it easy to assemble half rectangles. QuiltPaper app has an HST & HRT paper that makes it possible to create and print HRT templates at whatever size your project needs.
This example will show how to make a template for half-rectangles that can easily be assembled at whatever size your project needs.
1.Determine the finished size of the rectangle

In this example we'll create triangle paper for 3" x 6" rectangles.
2. Open the HST & HRT paper in QuiltPaper

Add a new HST & HRT paper
Set Square OFF and set rectangle to 3" x 6"
Adjust the seam allowance width, if needed
Set Shade Finished Triangle to ON to make it easier to see the layout

NOTE:
If you get the message “Unable to draw graph for the current settings” it may be the rectangles can not fit on the page with the current settings.
Open Page Settings (the tool at the bottom of the tool bar) and set the margins to zero. This will increase the area available for printing the template to the full page size. This adjustment to the margins may be enough to proceed.
If the rectangles still can not be drawn, you'll need to take additional steps to create your templates: adjust the settings for actual size printing and then print on a printer that can handle the size of paper you specified (may require using a large format printer at a copy shop.)
3. Confirm the template will print at exactly the right size and is not being scaled by the printer or printer drivers
Open the Size Check tool and add a scale to the paper:
Tap a color to display
Choose a guide and set
Print a test paper.
This step is important because sometimes a printer or the print drivers will scale an image (change it's size) as they do the work to print. For this initial test, to reduce the opportunities for scaling to get in your way:
Open More and choose PDF
Share PDF to a desktop
Print PDF from desktop
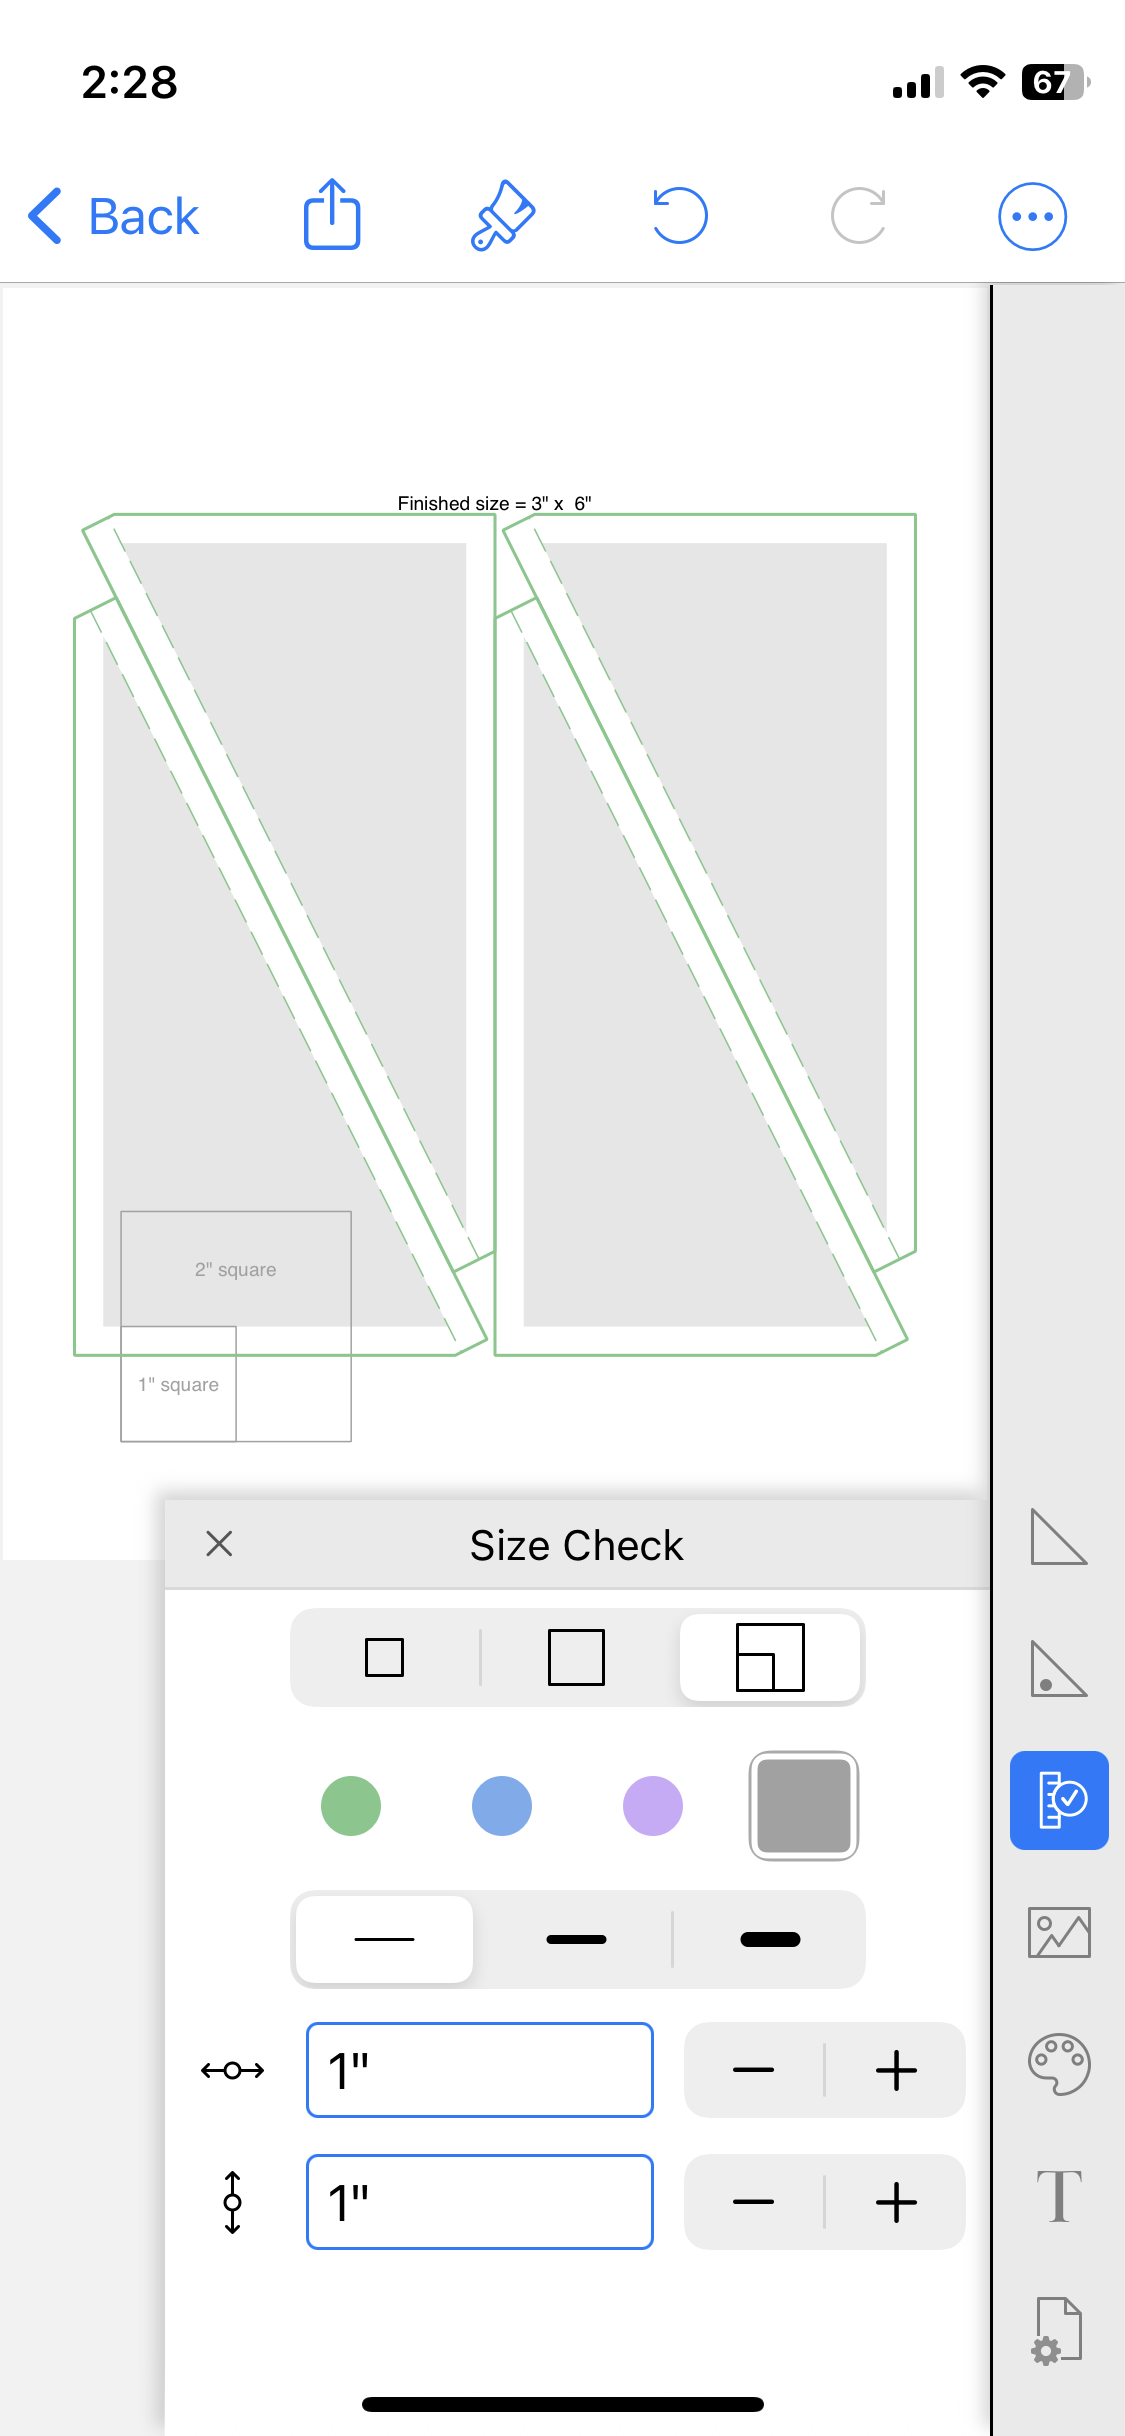

Measure the size check box and confirm it is just the size you expected. If it is not, read this for guidance on how to make adjustments to print at the exact size.

4. Make the HRTs
Follow these steps to use your HRT template:
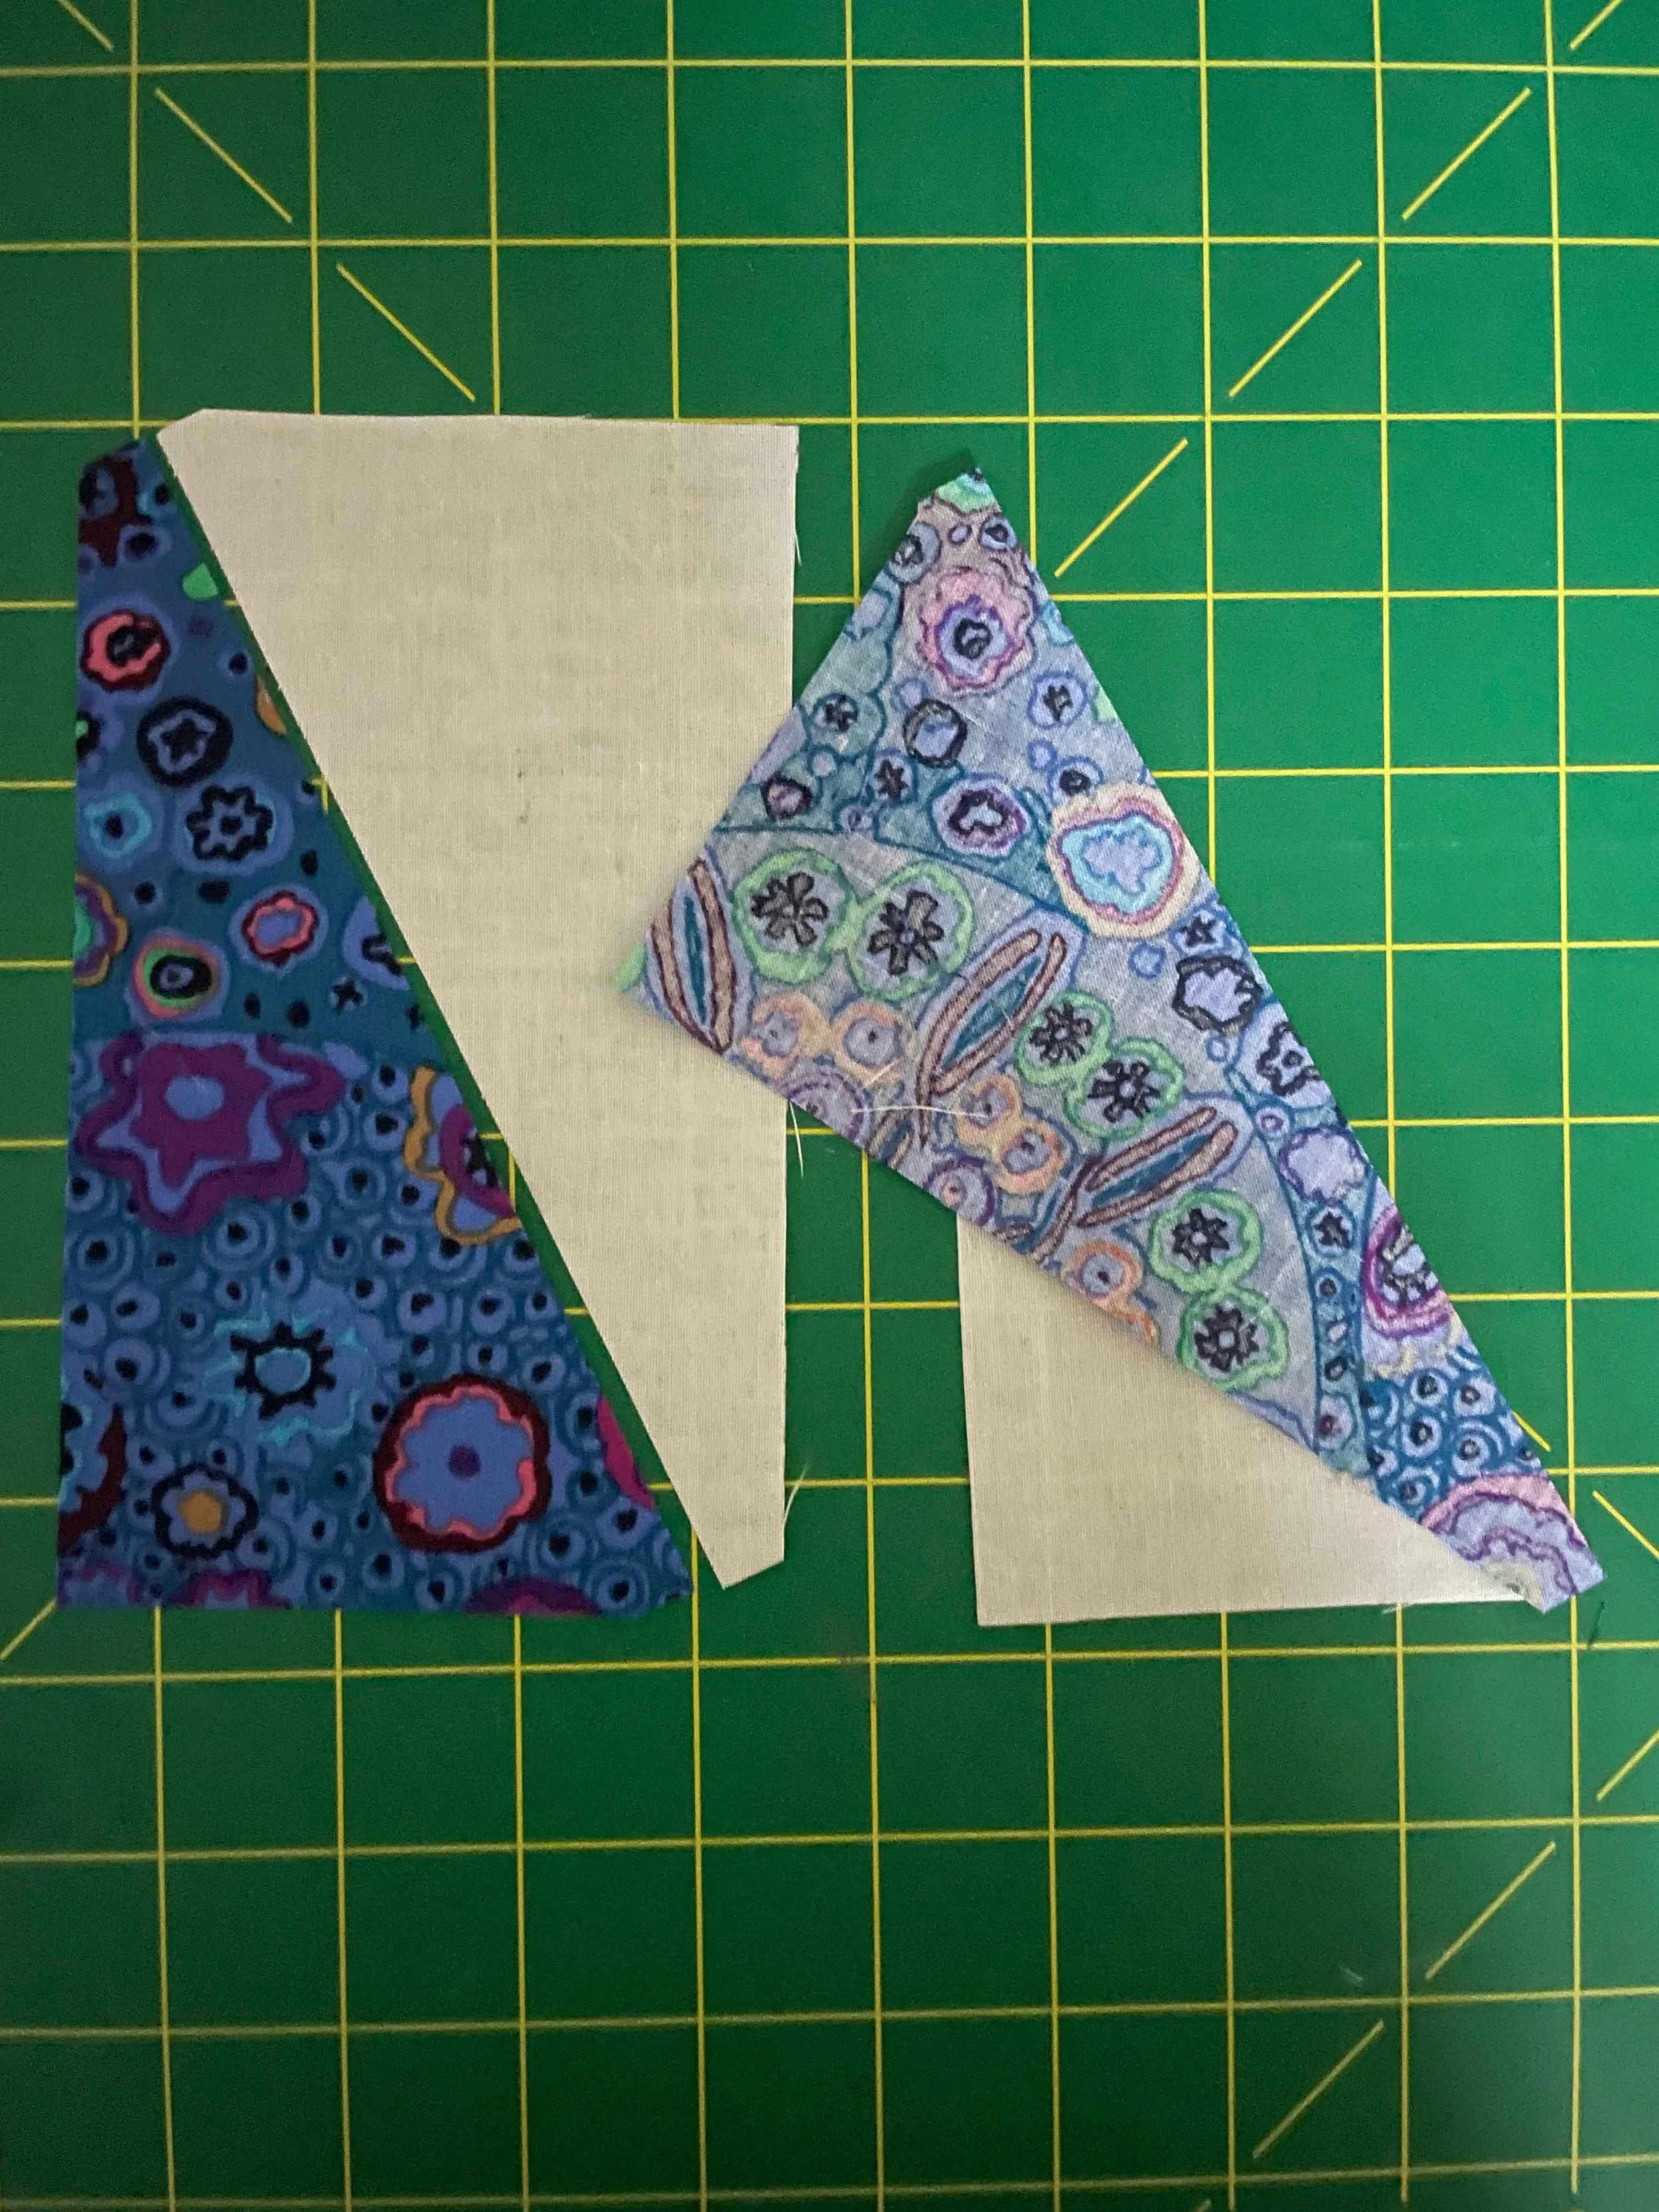
Cut one fabric at a time. If you want to layer two fabrics as was done for this example, both fabrics must be facing the same direction (That is, facing right side up or both facing right side down)
Secure a sheet of triangle paper on top of the fabrics
Cut along the solid lines, including the triangle tips
Remove the paper, keeping each side of the HRT separate


NOTE:
,An inkjet printer (no heat!) was used to print the template onto the plain side (not waxed) of a sheet of freezer paper trimmed to 8.5"x11".
Here's a brief outline of the process:
• Use a hot iron to the plain side of the freezer paper (placed waxed side down on the fabric) to secure the paper.
• Layer the other fabric below.
• Optionally lightly pin the layers.
• After cutting peel the freezer paper away and the pieces are ready to sew.
If you use freezer paper you will likely print a new template for every pair. If the paper is secured to the back side of a fabric, it can be used to guide sewing before removal by following this slightly different set of steps:
• Secure the freezer paper template to the back side of a fabric
• After cutting, leave the template in place and align the two half-rectangles, with fabrics placed right-sides together
• Orient with the template side up and sew along the stitching line to assemble the unit
• Remove the paper and press open the rectangle
Follow these steps to use your HRT template:Prepare for assembly:
With fabrics facing right side up, put the pairs together
Put one rectangle over the other by flipping one fabric so right sides are together, aligned along the diagonal, with matched up squared off ends

Finish unit assembly:
Sew along the diagonal
Press open your HRT
A check of an HRT made for this example confirms it is 3 1/2" x 6 1/2". Exactly as needed for a 3" x 6" finished unit size after block assembly.

